
Gone are the days when buying train tickets meant a direct visit to the station, enduring long queues, dealing with the heat, or navigating through travel agencies. With technological advancements, particularly the rise of smartphones, purchasing train tickets is now just a tap away.
Yet, it's important to acknowledge that not everyone finds this transition seamless. For first-time train travelers or those who are less tech-savvy, navigating online platforms might be confusing.
In this guide, I aim to simplify the process, detailing how to buy train tickets either digitally using specific applications or traditionally at the station's counter. If you're contemplating train travel in the foreseeable future, this article might just be your ticket to a hassle-free experience.
The digital space is flooded with applications designed for booking train tickets, prominent among them being KAI Access, Traveloka, and Tiket.com. Most online platforms allow ticket bookings from a window of 30 days up to a mere 3 hours before the scheduled train departure.
For the purpose of this tutorial, let's explore KAI Access, the official platform rolled out by PT Kereta Api Indonesia (Persero). Established on September 4, 2014, the primary objective behind KAI Access was to simplify the ticketing process for potential travelers.
KAI Access is multifunctional. Besides facilitating the purchase of tickets, it also allows users to cancel bookings, modify travel schedules, order meals during the journey, generate E-boarding passes, and even secure tickets up to 60 minutes prior to departure. Now, let's delve into the procedure of booking tickets via KAI Access:
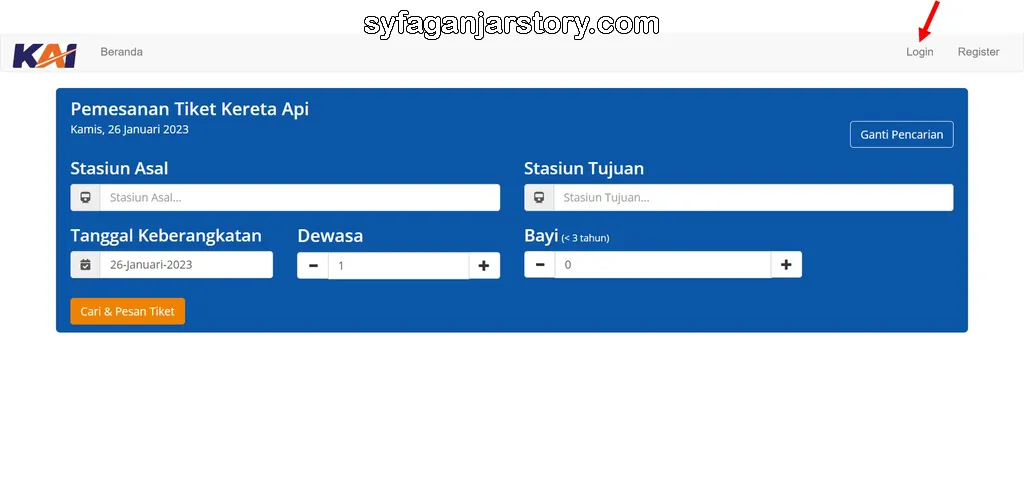
Initiate by either downloading the KAI Access application from the Play Store or App Store or by visiting the official KAI Access website. The user interface for both the app and website is similar, ensuring a seamless booking experience.
If using the website, like I am for this example, make sure to log in if you possess an existing account. New users will need to register, providing essential details such as name, ID number, date of birth, phone number, and email address.
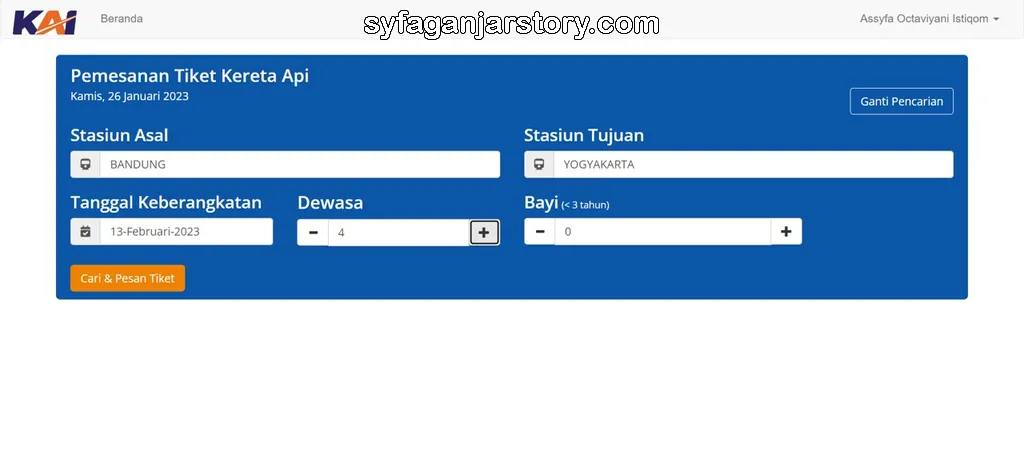
Decide on your origin and destination stations. To illustrate, I've opted for Bandung Station as the point of origin and Yogyakarta Station as my destination. Subsequently, choose your travel date and enter the number of passengers. For this walkthrough, let's consider four passengers.
Note: KAI categorizes passengers into two groups: adults and infants (below three years of age). Hence, children aged three and above require individual tickets.
Traveling with a child aged between three and ten without a valid ticket will result in a fine equivalent to the adult fare. Once these selections are made, proceed by clicking on "Search & Book Tickets".
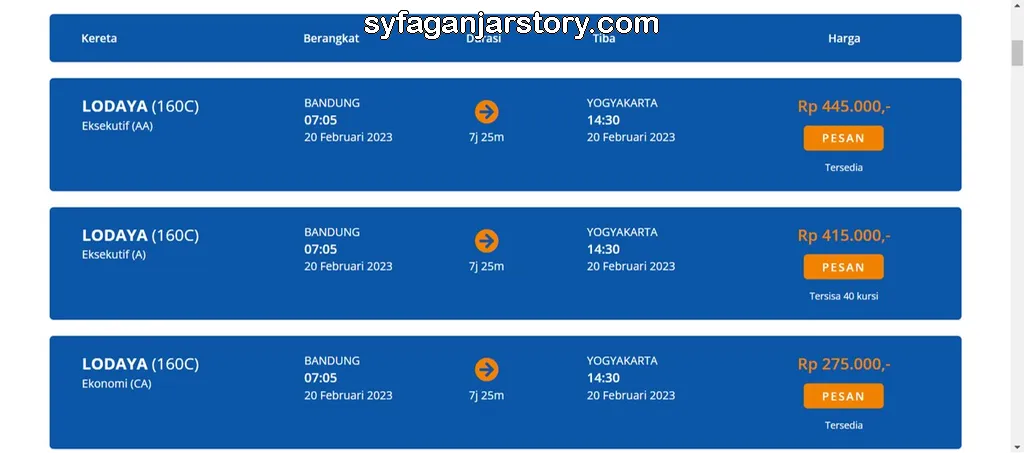
You will be redirected to a page displaying various trains, along with their fares. Depending on preferences and budget, travelers can opt for executive, economy, business, or other available classes. Typically, the train selection page will highlight:
Prominent names might include the likes of Lodaya, Argo Wilis, Malabar, Turangga, and Mutiara Selatan, to name a few. While some trains exclusively offer a single class, others provide a mix.
Below the train name, there are specific class options such as economy, premium economy, business, executive, and luxury. You might also encounter sub-class codes like A, H, I, J, X, etc. For an in-depth understanding, it's advisable to refer to articles elucidating the nuances of each class and their amenities.
This segment provides details regarding the train's departure, the total journey time, and the expected arrival. Each train may have varying durations, so pick a suitable time slot.
Lastly, the most crucial detail for many – the fare. The list will provide different fare options, determined by the train and class combination. For instance, the Lodaya train might offer both executive and economy classes, each priced distinctively. Select the option that aligns best with your budget and comfort criteria.
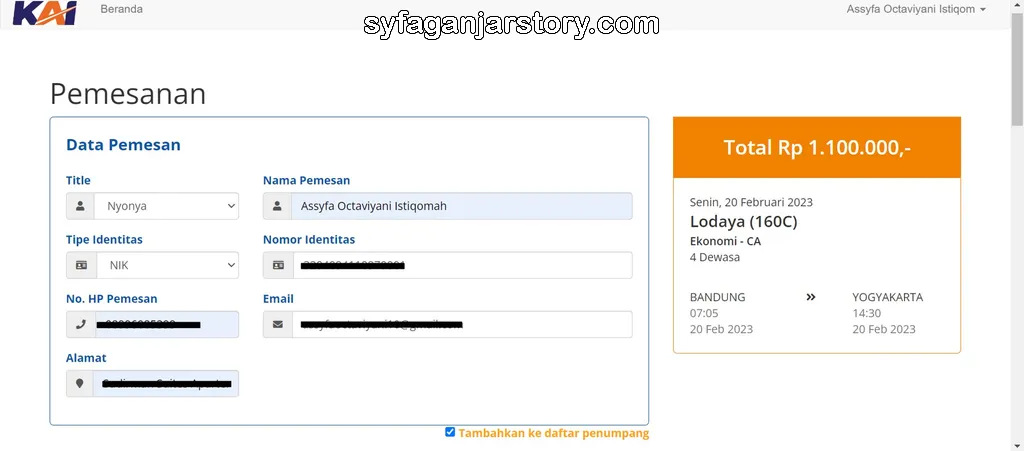
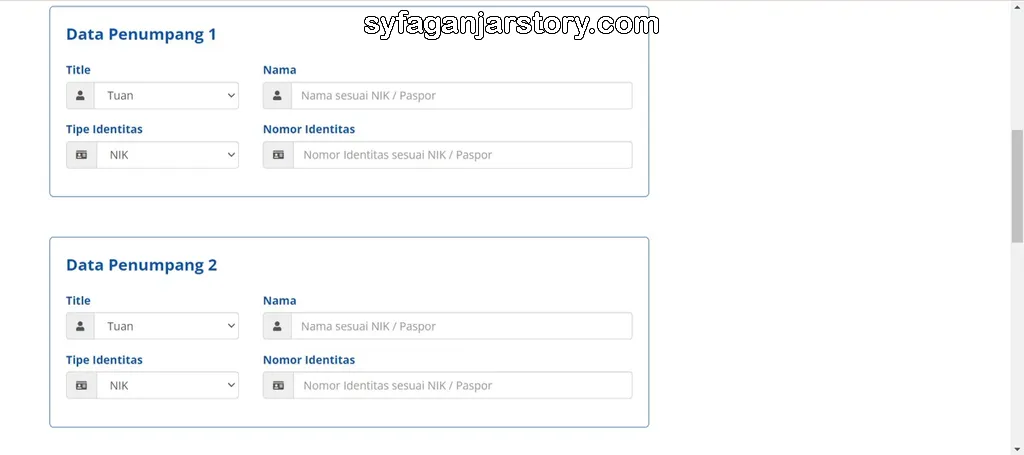
Once you've decided on a suitable departure time and train class, it's time to proceed by hitting the "order" button. Doing so will redirect you to a page where you'll need to input the booker's data as well as the information for any additional passengers accompanying you.
For the booker's section, it's essential to provide the details even if the person filling out the form isn't traveling. The necessary information includes title, full name, type of identification (like KTP/Passport), phone number, email, and residential address.
Should the person booking also be a passenger, there's a convenient checkbox labeled 'Add to passenger list' that you can select. For other accompanying passengers, it's crucial to input their names and KTP numbers.
Accuracy is paramount here, as any discrepancies could lead to future issues. Once you've double-checked everything, acquaint yourself with the terms and conditions and proceed by clicking 'Order'.
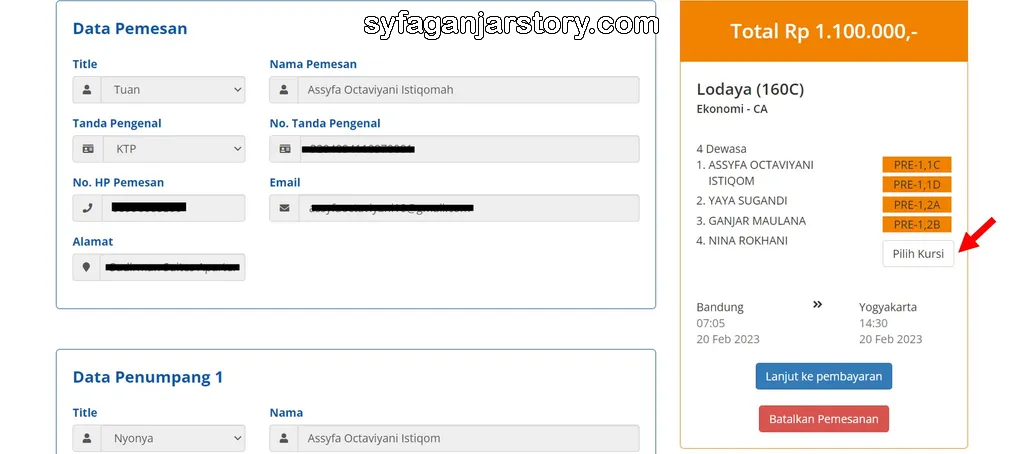

Upon confirming your order, you'll be directed to the booking overview page. Here, you have the option to pick specific seats for your journey or advance directly to the payment. Want to cherry-pick your spot? Simply click 'Select seat' found below the passenger name list.
Navigating to the seat selection page, be mindful of the passenger names and their associated codes. Start by clicking a passenger's name followed by their code, and then choose the desired seating location.
An interesting tidbit: you might notice a peculiar code like "PRE-1" when picking a seat. This signifies 'Premium Economy' (PRE). Depending on your ticket class, such a code can help you differentiate between premium and regular economy seats.
For the sake of your travel comfort, ensuring you make the right choice is vital. If you're curious about the best spots or want some handy pointers on selecting train seats, consider diving into this related article.
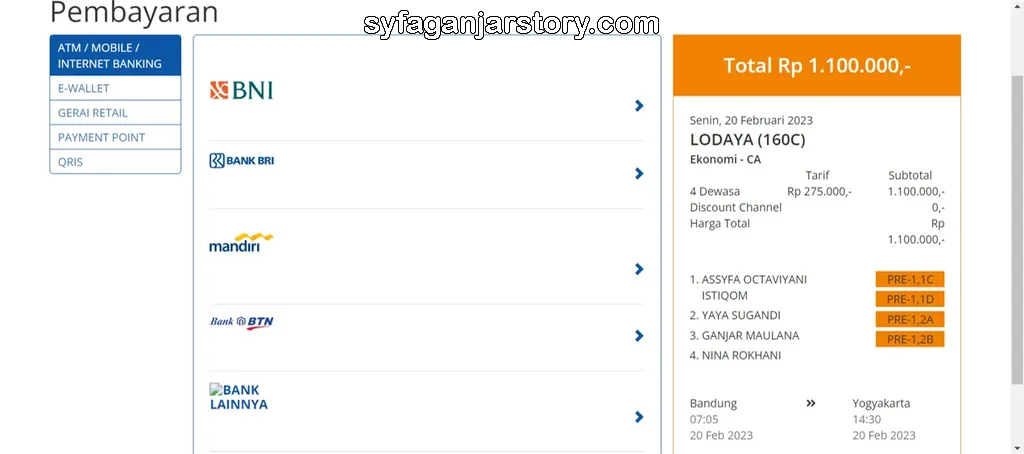
Having double-checked all your details, it's time to focus on the payment. Review the specifics one last time before moving forward. A myriad of payment options await you, including ATM/Mobile Banking, E-wallet, Indomaret, Pos Indonesia, and QRIS.
Timely payment is critical to avoid the frustrating process of starting your booking from scratch, so make sure to adhere to the given deadline. Once completed, always check the confirmation that will be sent to the email you provided. Ensuring this email is active and accessible is crucial.
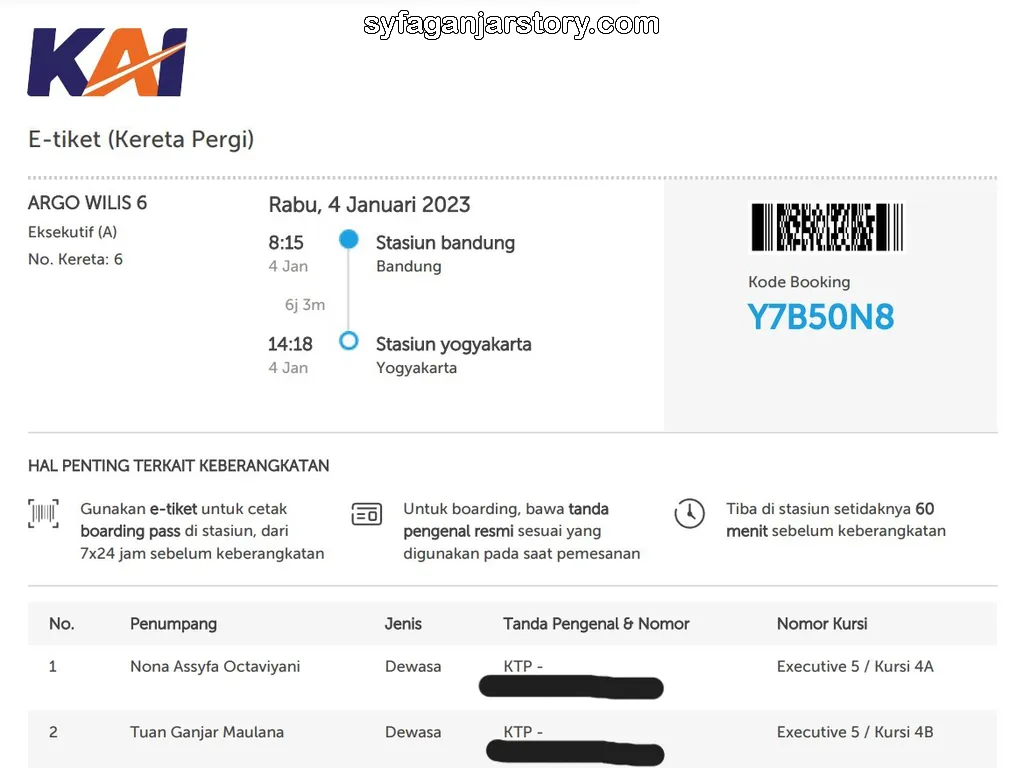
After successfully acquiring your online ticket, you might wonder, "What's next?" The beauty of online ticketing is that physical prints are typically unnecessary. Prepare yourself and, when your departure day dawns, simply print the boarding pass at the station.
To sum up, these straightforward steps should guide you seamlessly through booking your train tickets via the application or the official KAI Access website. Should there be any lingering questions about online train ticket purchases, don't hesitate to drop a comment below. Safe travels!
In this digital age, while many have migrated to online booking, not everyone can or wants to purchase train tickets online due to gadget and internet constraints. Recognizing this, KAI, unlike many airlines, still offers an in-person ticketing option at the station.
However, there's a catch. Direct purchases at the station can only commence 3 hours prior to the train's departure. This is commonly referred to as a "go show". This means you can only buy tickets for trains departing the same day.
But here’s the thing, opting for a "go show" can be a gamble. There's a real chance tickets might already be sold out. Plus, these tickets are available only at major stations that have designated counter personnel. Here's a step-by-step breakdown of the process:
Your journey starts by arriving at your departure station. Remember, you can't purchase a ticket from a station that isn't your departure point. Have your ID or another form of identification on hand.
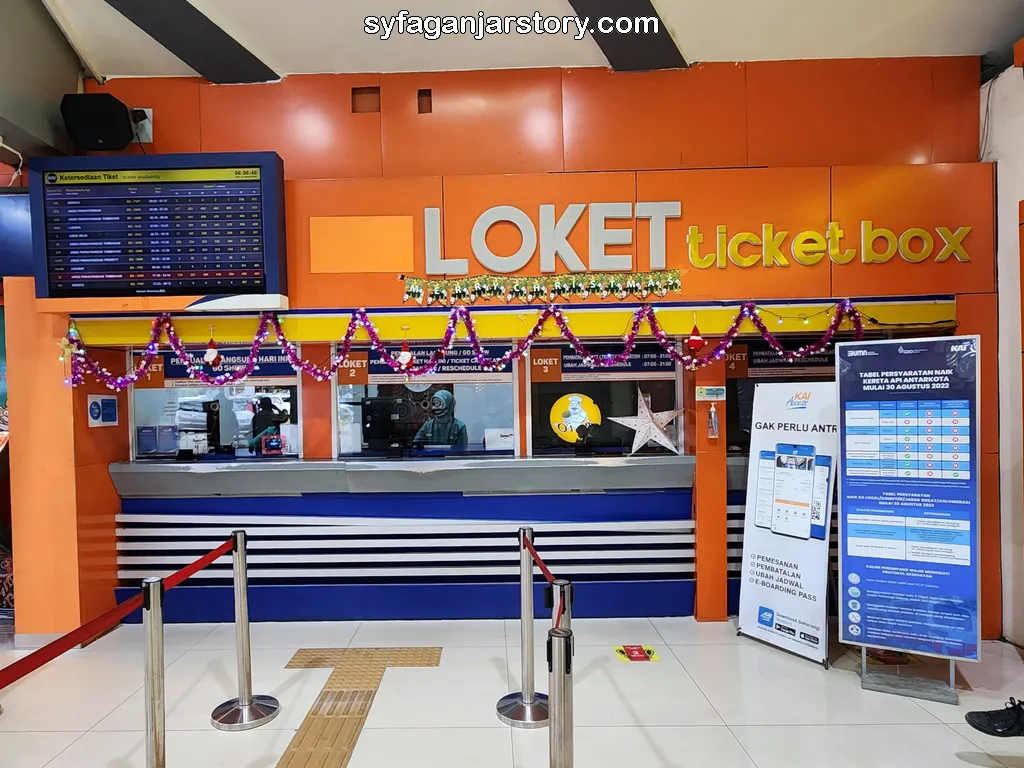
Once at the station, locate the ticket counters. It's wise to first read the signs or descriptions atop each counter since different counters cater to different services. Imagine spending time in a queue only to discover you're at the wrong counter!
For instance, Bandung Station houses counters specifically for "go show" sales, others just for cancellations or rescheduling, and some that cater to all ticketing needs.
At the correct counter, give the officer your desired travel specifics, such as your final destination, train class, number of tickets, and departure time. They will then offer you the available options.
If the options suit your needs, you can finalize your purchase. Typically, the payment modes for "go show" tickets are limited to cash or debit cards. QRIS often isn't an option. Once payment is settled, you'll receive your ticket, which often doubles as a boarding pass, eliminating the need for additional printing.
That wraps up the essentials of both online and offline train ticket procurement. Whether you’re a digital native or a traditional traveler, this guide aims to simplify your train journey preparations.
I would like to also address some questions commonly asked by future travelers:
What is a seatless train ticket?
A seatless train ticket doesn’t assign you a specific seat number. You have the freedom to select any seat once on board. These types of tickets are typically for local trains.
What are the hours for "go show" ticket purchases at the station?
You can buy "go show" tickets between 07:00 am to 21:00 pm.
Can I book a train ticket on someone else's behalf?
Absolutely! You can book for others; just make sure to enter their specific details like name, ID number, etc.
Is it possible to transfer my train ticket to someone else?
No, train tickets are strictly for the individual whose name appears on it.
Which seats are window seats on the train?
Window seats are typically at the start and end of seat rows. If seats are labeled 5A, 5B, 5C, and 5D, for instance, 5A and 5D are your window spots.
Which seat on the train is facing each other?
The seating arrangement takes a slightly different turn in the economy class. Here, seats are designed to face each other, which means seats in row 1 face those in row 2, those in row 3 face row 4, and the pattern continues.
However, the premium economy class throws in a twist. Not all rows have seats facing each other. In a train configuration that has rows numbered 1-21, the seats that face each other are 11-12. For trains with rows numbered 1-20, the corresponding facing seats are 10-11, and in setups with rows 1-17, it's the 9-10 seats.
And if you're looking at business and executive classes, flexibility is the name of the game. Seats in these classes can typically be rotated to suit the passenger's preference, adding a touch of luxury and comfort.
What if I made an error on the ticket details?
Mistakes happen! If you've made an error on details like name or seat number, you can reach out to PT KAI's customer service at 021-121, shoot an email to cs@kai.id, or just visit your nearest station for assistance.
How much does the admin fee cost If I want to reschedule my trip?
If you're pondering a shift in your train schedule, be prepared for some fees. Any changes to your train schedule come with an administration charge, which is typically 25% of the ticket price.
Additionally, if there's a difference in the cost between your original ticket and the new one, you'll need to cover that too.